

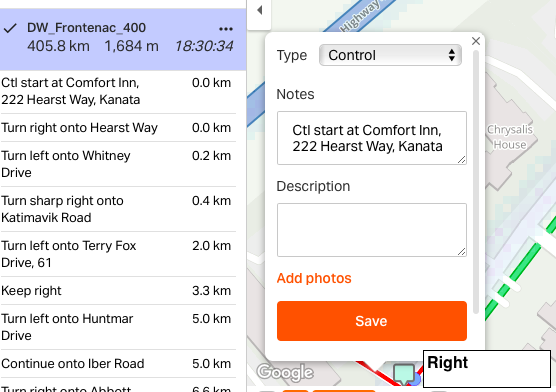
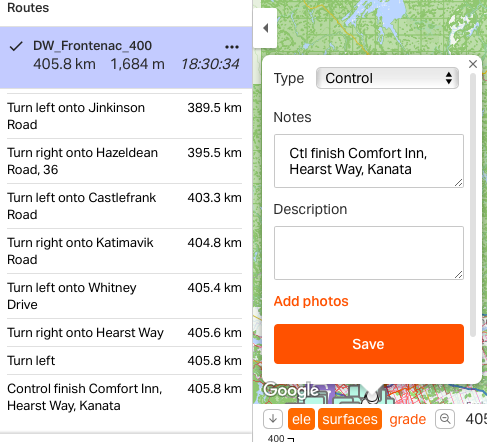
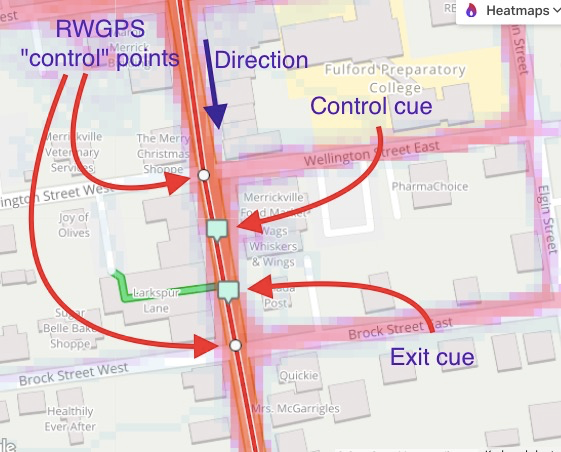
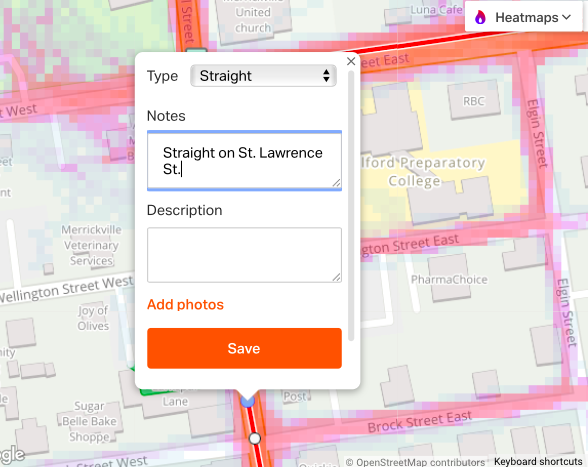
There are 4 parts to a control on Ride with GPS: two "control points", the control cue and an exit cue. Ride with GPS throws away custom cues when ever a route is edited. In order to protect custom cues "control points" are used around our custom cues. "Control" points have nothing to do with brevet controls, they are dots placed on the line to protect custom cues. See picture below.
In the NOTES box of the custom cue start with the word Control, case is not important. Follow the word control with the name andor address of the business, a comma "," and then the text you want to appear on the brevet card.
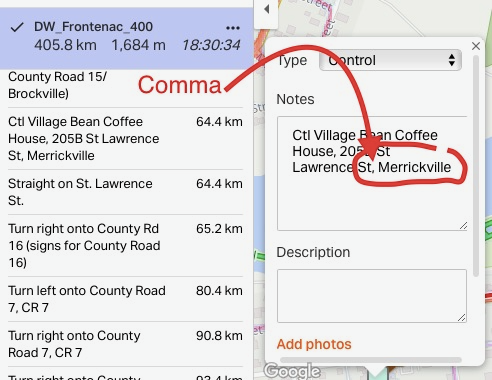
The brevet card needs only show the name of the town.
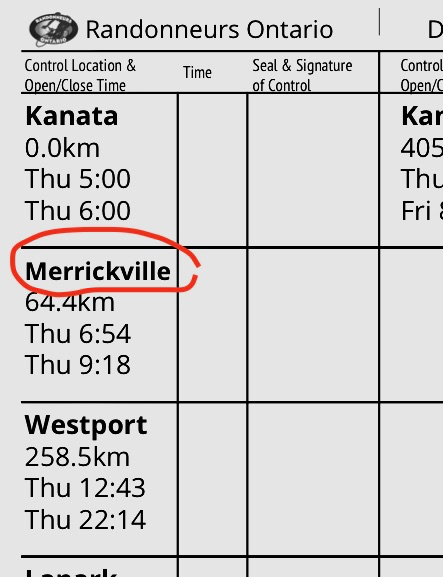
Any number of commas can appear on the line, only the text after the last comma is taken as the town name.
Help tired riders remember where they are going when they leave the control.
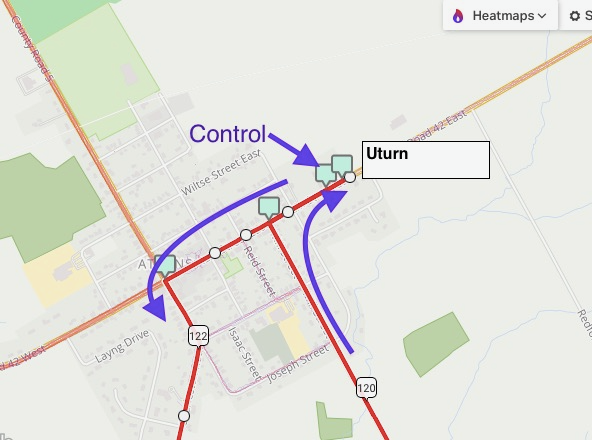
A more complex example is where the control is on a corner or is out and back. Have an exit cue that will save the rider a few km of bonus. Here is an example of an out and back where a U-Turn is appropriate.
The route name, start date, start time are all required before control times can be calculated. The drop down menus below have the names of all of Randonneurs Ontario brevet routes. Choose the name of the route, then select the start date and start time. If a control is missing it has to be entered from RWGPS, but if the control has an entry but Location is not suitable the text can be edited. With no rider entries Print brevet card" will produce 2 cards with blanks for the rider names.
The route name and the cue locations can be edited as needed.
Flèche Ontario rules
In Ride with GPS, prepare the route controls using the same
guidelines
as for a brevet card.
make sure Visibility is Public!
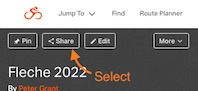
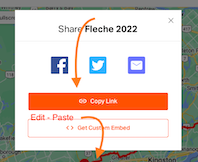
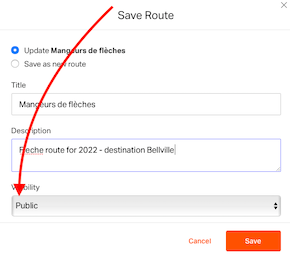 Link - share - your team's planned route as shown below.
To recieve a brevet card, a rider must be a member of Randonneurs Ontario. A family membership or an individual membership admitts a rider to all of the rides in one calendar year. The tool below, "VALIDATION", opens a drop down box that contains names of members registered for the current season. If a name is not on the list, the person is not a member. Membership type is shown to the right of each name. Trial members may ride a single event only.
Organizing a single ride with a small number of riders may be done the night before the ride. The organizer selects each rider name from the validation list and then prints the cards. For a more complex event such as Devil Week it may be helpful to organize the rider lists in advance. The following tools allowing saving rider lists for multiple rides.
| Page count | |
| Blank count |
Download rider list as .csv file will collect the names entered and generate a file in comma separated values format. The suggested file name includes the route name and date of the ride. This button is disabled until a ride date, time and route have been selected.
The layout is made for 8.5"x11" letter paper. There is print up to about 1/8" of the paper edges on both sides which seems to work fine on the printers available today. Check that print scaling is 100% before print and adjust if necessary. If your printer cannot print close to the edges fit to page can be used. In that case it will not be possible to make equal size panels and have fold lines on the marks indicated. Ignore the mis-alignment is a good choice but, if you want equal size panels and match the fold lines, an edge will have to be trimmed.
Event name, rider name and control names are converted to windows-1252 characters. For the event name and rider name the font is scaled up starting from 4 points to fit each on its own line. For short event names the font size can be increased to 19 points while rider name size stops at 12 points. The rider name cannot be edited. It is always printed in the same way that it was entered into CCN when the rider joined. The rider name printed vertically along the "spine" of the card is in 13 point type.
Sometimes the event name as entered in the route archive is longer than necessary and will result in very small text. Click inside the event name above and the part that will be printed on the top line of the event will be framed with a fine border. If possible, edit the name to be about 16 characters long. The distance part will always be printed on a second line under the name and in 12 points or larger. Note that the event name is also printed in the header on the back of the card so check the appearance there if you edit the name.
"Flèche Ontario" replaces "CONTROL CARD" and the team name replaces the event name. The distance to the last control is taken as registered distance and shown under the team name. Audax Club Parisien specifies that the control card says “Verified and validated by the Audax Club Parisien”. Flèche controls do not have open/close time, the rider enters the time of passage at each control. On the summary panel, there is an entry for total distance. The last 2 controls are the 22 and 24 hour controls. The rider enters location, distance at passage.
Organizer contact information can be placed on three lines provided on the front of the card initially showing "Tel:","Email:" and "Name:". If not all of these lines are desired, remove all text including spaces and the following lines will be moved up. Each line is limited to 26 characters.
The back page is a grid layout that follows the progression of the ride past each control. There are always 3 columns and an adjustable number of rows. There is a minimum of 4 rows allowing for 12 controls. The number of rows is increased to either 5 or 6 as needed to accomodate the number of controls including secret controls. When more rows are needed the font size and line spacing is adjusted to maintain the appearance and readability of the card. This provides enough controls for brevets of 200, 300, 400, 600, 1000 km. At 1000 km 17 controls plus 1 secret control allows an average spacing of about 60 km between controls.
The back page header is indirectly edited when the event name is edited for the front page. Since the back page header uses smaller font size than the front page there is usually more than enough space centred at the top of the back page for the event name.
The place names of the controls are taken from the cue sheet entered in RWGPS. If the name is too long for the cell, brevetcard scales the font down until 4 points. If the name is still too long the name is allowed to spill across until the entire cell is filled. Then the name is truncated. Most of the time, this scaling is not very desirable so the individual cells can be edited. The intention is not to change the location of the control, since that is given on the cue sheet. But, a contraction could be introduced that would allow a larger font size. The location should remain clearly identifiable to convenience store clerks who might be asked to sign.
Brevet card cells can be dedicated to secret controls by choosing 1 or 2 here. Flèche control cards ignore this control.
Emergency Contact Ride Organizer
Copyright 2025, Randonneurs Ontario
Comments? E-mail the WebMaster